Exadata and iPhone
4/10/2014 01:34:00 AM
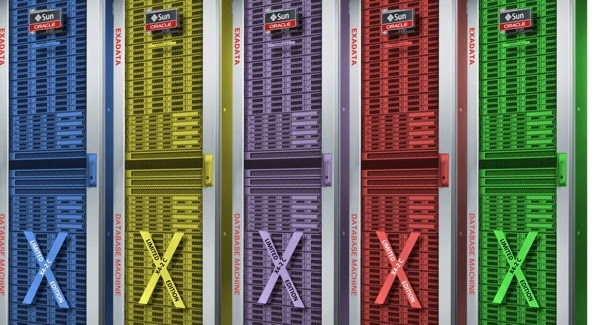
I never thought one day I will find a similarity between Oracle Exadata and iPhone. But it was before Oracle announced X4-2C, the colorful Exadata:)
However, I don't think that X4-2C is cheaper as iPhone 5C is, since it's a limited edition...

Is Database 12c Supported on Exadata?
9/03/2013 06:23:00 PM
Answer is yes, even you can see 12c is listed under supported versions in document [888828.1].
However, there is a couple of buts (you should see this coming). Since latest Exadata Storage Software (version 11.2.3.2.1) does not have new offload libraries, smart scan offload filtering and storage indexes become disabled with 12c. Smart scans are initiated but nodes get back blocks instead of rows and columns in the projection list. Also IORM plans are not enforced and inter-database plans are disabled on cells. And finally, cell metrics display 12c databases under OTHER_DATABASE.
So, it seems better to wait until next Exadata update and probably 12c patch set update to upgrade your Exadata. At least, to be able upgrade to a fully functional state. Meanwhile, you'd better upgrade to 11.2.0.3 if you haven't yet because upgrading from 11.2.0.1 is not supported.
Data Pump Options
1/30/2013 10:38:00 PM
1. Create a directory in ASM disk group:
SQL> alter diskgroup RECOVERY add directory '+RECOVERY/DPUMP';
2. Create a directory in the database pointing to the ASM directory:
SQL> create directory ASM_DIR as '+RECOVERY/DPUMP';
3. Grant write on directory created above to the user you'll use while exporting:
SQL> grant read, write on ASM_DIR to <export_user>;
3. Create database a link:
SQL> create public database link target_db connect to <remote_user> identified by <password> using '<tns_entry>';
It's required that both the local and remote users are granted to the EXP_FULL_DATABASE role.
Exporting
Now it's time to export. At local server, run:
$ expdp NETWORK_LINK=target_db DUMPFILE=ASM_DIR:dump_file.dmp LOGFILE=DATA_PUMP_DIR:export.log FULL=Y EXCLUDE=STATISTICS COMPRESSION=ALL PARALLEL=8
To briefly explain parameters given:
- NETWOK_LINK is the one pointing to remote database. This is how we export remote database.
- As you may see, dump file is being created under directory ASM_DIR pointing the directory in ASM disk group.
- Notice that log file is not being created under ASM directory because it's not supported. That's why I've used default data pump directory. Also you may choose not to log by using parameter NOLOGFILE=Y instead.
- We're having a full database dump by using FULL=Y parameter. Instead you may use SCHEMAS, TABLES or TABLESPACES parameters to export/import only given schemas/tables or tablespaces.
- Our dump will not include statistics because of the parameter EXCLUDE=STATISTICS. You can use this option to exclude other objects such as tables or indexes, too. I choose to exclude statistics because I'd rather gather statistics at the database I'm going to import the dump.
- By means of the parameter COMPRESSION we'll have a smaller sized dump file. To give a hint how much could it be reduced in size, here is a few statistics I've had with different characteristics of data:
| Estimated | Actual | Gain Percentage |
| 687.7 MB | 188.13 MB | 72.64% |
| 154.3 GB | 56.44 GB | 63.42% |
| 287.2 GB | 207.93 GB | 27.6% |
- Lastly, to improve performance we use the parameter PARALLEL. Data pump is a tool you can get full advantage of parallelism. Therefore it's good to use as much as possible.
After exporting you can query and check dump files. To query files exported under ASM:
SQL> select a.name, f.bytes/1024/1024 mb, f.creation_date
from v$asm_file f, v$asm_alias a
where f.file_number=a.file_number and a.system_created='N' and f.type='DUMPSET';
To check dump file, best tool to use is again data pump, use parameter SHOW:
$ impdp DUMPFILE=ASM_DIR:dump_file.dmp NOLOGFILE=Y FULL=Y SHOW=Y
Finally, if you need to copy the dump file to somewhere else, it could be achieved by asmcmd tool:
$ asmcmd -p cp RECOVERY/DPUMP/dump_file.dmp /destination_directory
Retrieving Index Usage Statistics
8/29/2012 11:31:00 AM
Indexes are old friends of every DBA. To check out what your friends are up to, in Oracle, basic way is enable monitoring for the index by:
alter index IX_FOO nomonitoring usage;
However what is lacking in this way of monitoring is statistics. You can see whether index is used but cannot see how many times or how it is used. Fortunately Oracle provides many V$ views. The query below returns basic statistics about your indexes. How it is used (range or full scan etc.), how many times and when was the last time it was used:
select sp.object_name as index_name,
sp.options,
sum(sa.executions) as executions#,
max(timestamp) as last_used
from v$sql_plan sp, v$sqlarea sa
where sa.address = sp.address
and sa.hash_value =sp.hash_value
and sp. operation = 'INDEX'
and object_owner in ('SCOTT')
group by object_name, options
order by 3 desc;
With Exadata, we've started to use less indexes and even dropped some existing ones. Because we want to use Exadata features like storage indexes and smart scan instead, we let the cells do their job. On Exadata we prefer to see fast full scans instead of range scans. To see Exadata specific statistics related to indexes, you can add columns with prefix "io_cell" in V$SQLSTATS or V$SQLAREA views. Such as:
select sp.object_name as index_name,
sp.options,
sum(sa.executions) as executions#,
max(timestamp) as last_used,
sum(sa.disk_reads) as disk_reads,
sum(sa.direct_writes) as direct_writes,
sum(sa.io_cell_offload_eligible_bytes)/1024/1024 as offloadable_mb,
sum(sa.io_cell_offload_returned_bytes)/1024/1024 as offloaded_mb,
sum(sa.rows_processed) as rows_processed
from v$sql_plan sp, v$sqlarea sa
where sa.address = sp.address
and sa.hash_value =sp.hash_value
and sp. operation = 'INDEX'
and object_owner in ('SCOTT')
group by object_name, options
order by 3 desc;
There are many other statistics you can find in V$ views, so you can improve the query according to your needs.
Upgrading Oracle Enterprise Manager 11g Grid Control to 12c Cloud Control with Exadata Plug-ins
4/26/2012 06:21:00 PM
Upgrading 11g Grid Control to 12c Cloud Control with 1-System Upgrade Approach:
$ unzip p6880880_111000_Linux-x86-64.zip -d <OMS_HOME>/
$ unzip p10065631_111010_Generic.zip
$ <OMS_HOME>/OPatch/opatch prereq CheckConflictAgainstOHWithDetail -phBaseDir ./10065631
If no conflict is found
$ <OMS_HOME>/bin/emctl stop oms
$ cd 10065631
$ <OMS_HOME>/OPatch/opatch apply
$ export ORACLE_HOME=<OMS_HOME>
$ <OMS_HOME>/bin/rcuJDBCEngine sys/<Password>@<host_name>:<db_sid> JDBC_SCRIPT post_install_script.sql $PWD $ORACLE_HOME
$ <OMS_HOME>/bin/rcuJDBCEngine sys/<Password>@s<host_name>:<db_sid> JDBC_SCRIPT post_install_pactht.sql $PWD $ORACLE_HOME
$ <OMS_HOME>/bin/emctl start oms
3. Now we can install preupgrade patch. You can download it from OTN.
$ unzip p13597150_111010_Generic.zip
$ <OMS_HOME>/bin/emctl stop oms
$ <OMS_HOME>/bin/emctl start oms
$ cd 13597150
$ <OMS_HOME>/OPatch/opatch apply
$ <OMS_HOME>/bin/rcuJDBCEngine sys/<Password>@<host_name>:<db_sid> JDBC_SCRIPT $ORACLE_HOME/sysman/preupgc/puc_dblink_pkgdef.sql
$ <OMS_HOME>/bin/rcuJDBCEngine sys/<Password>@<host_name>:<db_sid> JDBC_SCRIPT $ORACLE_HOME/sysman/preupgc/puc_dblink_pkgbody.sql
$ <OMS_HOME>/bin/rcuJDBCEngine sysman/<Password>@<host_name>:<db_sid> JDBC_SCRIPT $ORACLE_HOME/sysman/preupgc/pre_upg_console.sql
$ <OMS_HOME>/bin/emctl start oms
When you click on validate a job will run and analyze your agent(s). Your agent(s) might fall into one of these groups:
- Completely Upgradable - A non-windows agent with no or upgradable plugins.
- Missing Plug-Ins Software - A non-windows agent with not upgradable plugins. My agents falls in this category since it is a Linux agent with Exadata plugins. Starting from 12c, Exadata features are included in OEM, so no plugin is required.
- Missing Agent Software - Agent software is not available
- Not Supported - A Windows agent
5. After verifying agent(s), upgrade them by following steps below described in Oracle documentation. First three steps will create a job, you can find job output screen in each step:
a) Deploy and configure the software binaries of Oracle Management Agent 12c

b) Generate a health report and check the readiness of the predeployed Management Agents

c) Verify and sign off the health check report
d) Switch over the old Management Agents to the newly deployed ones so that they can communicate with Enterprise Manager Cloud Control

Check the status of upgraded agent:
---------------------------------------------------------------
Agent Version : 12.1.0.1.0
OMS Version : (unknown)
Protocol Version : 12.1.0.1.0
Agent Home : <AGENT12c_HOME>/agent_inst
Agent Binaries : <AGENT12c_HOME>/core/12.1.0.1.0
Agent Process ID : 19089
Parent Process ID : 18963
Agent URL : https://<host>:3872/emd/main/
Repository URL : https://<host>:4900/empbs/upload
Started at :
Last Reload : (none)
Last successful upload : (none)
Last attempted upload : (none)
Total Megabytes of XML files uploaded so far : 0
Number of XML files pending upload : 69
Size of XML files pending upload(MB) : 0.07
Available disk space on upload filesystem : 21.46%
Collection Status : Collections enabled
Last attempted heartbeat to OMS :
---------------------------------------------------------------
Agent is Running and Ready
$ <OMS_HOME>/bin/emctl stop oms
$ ./runInstaller


You may now log on to new OMS Console.
Discovering Exadata Through 12c
OMS_LOCATION = MY_GC
EM_BASE = / u01/app/embase
OMS_HOST = oemserver.company.com
OMS_PORT = 4900
EM_USER=oracle
EM_PASSWORD=<password>
Do check the port number by running following command on OEM server:
To install agent, as root:

Installing Oracle R Enterprise
3/20/2012 07:02:00 PM
Oracle has integrated popular statistical package R as a component of database's Advanced Analytics Option. Oracle R Enterprise comes with Big Data integrated too. It also can be installed separately to 11 R2 databases on Oracle Linux 5 64-bit and naturally to Exadata. I'll try to briefly explain how you can install it.
Prerequites:
1. If not already enabled, enable yum repos for Oracle. You can find out how from Oracle public yum site.
2. Install R
$ yum install R.x86_64
Installing Client on Windows:
1. Next thing to be done is installing client tool. Download R for Windows from R Project and install it.
2. Download Oracle R Enterprise Client Packages and Client Supporting Packages for Windows from OTN and unzip them.
3. To install packages; run R from All Programs as administrator, from the menu: Packages -> Install package(s) from local zip files:
a. Navigate to <unzip_dir>\ore-supporting-windows-1.0\bin\windows\contrib\2.13
b. Select; DBI_0.2-5.zip, png_0.1-4.zip and ROracle_1.1-1.zip
c. Click open:
package 'DBI' successfully unpacked and MD5 sums checked
package 'png' successfully unpacked and MD5 sums checked
package 'ROracle' successfully unpacked and MD5 sums checked
d. Repeat the step for client packages. Navigate to <unzip_dir>\ore-windows-1.0\bin\windows\contrib\2.13
e. Select; ORE_1.0.zip, OREbase_1.0.zip, OREeda_1.0.zip, OREgraphics_1.0.zip, OREstats_1.0.zip, ORExml_1.0.zip
f. Click open:
package 'ORE' successfully unpacked and MD5 sums checked
package 'OREbase' successfully unpacked and MD5 sums checked
package 'OREeda' successfully unpacked and MD5 sums checked
package 'OREgraphics' successfully unpacked and MD5 sums checked
package 'OREstats' successfully unpacked and MD5 sums checked
package 'ORExml' successfully unpacked and MD5 sums checked
Installing Server:
1. To install server download ore-server-linux-x86-64-1.0.zip from OTN.
2. Extract files
$ tar xzf ore-server-linux-x86-64-1.0.tar.gz
$ export R_HOME=/usr/lib64/R
$ export ORACLE_HOME=/u01/app/oracle/product/11.2.0/dbhome_1
4. Install
$ cd ore-server-linux-x86-64-1.0/
$ ./install.sh
5. Enable R for the user:
SQL> grant rqrole to <user_name>
To connect your database through R run R client:
R> ore.connect(user="<user_name>", sid="<DB_SID>", host="<host_name>", password="<password>", port = 1521)
R> ore.sync
R> ore.attach()
R> ore.ls()
R> help(Startup)
Backing up Exadata Storage Cell
2/09/2012 04:59:00 PM
$ imageinfo
Kernel version: 2.6.18-194.3.1.0.4.el5 #1 SMP Sat Feb 19 03:38:37 EST 2011 x86_64
Cell version: OSS_11.2.0.3.0_LINUX.X64_110520
Cell rpm version: cell-11.2.2.3.2_LINUX.X64_110520-1
Active image version: 11.2.2.3.2.110520
Active image activated: 2011-06-24 00:04:28 -0700
Active image status: success
Active system partition on device: /dev/md5
Active software partition on device: /dev/md7
In partition rollback: Impossible
Cell boot usb partition: /dev/sdm1
Cell boot usb version: 11.2.2.3.2.110520
Inactive image version: undefined
Rollback to the inactive partitions: Impossible
What is left for you to back up is just a couple files listed below:
1. /etc/hosts
2. /etc/modprobe.conf
3. /etc/sysconfig/network
4. /etc/sysconfig/network-scripts/*
Exadata turns your USB disk into a bootable disk of active image of your system.
Backing up Infiniband Swithes
1/28/2012 05:49:00 PM
If you're an Exadata admin, your title becomes DMA (Database Machine Administrator) instead of DBA. Since backups are routine tasks of every DBA, scope of what to backup extends a little bit when it comes to Exadata. Beyond the databases, you need to backup hardware also.
So, let's start with infiband swithes. Before configurations changes or updating its software it's a good practice to backup them. There are 3 things to backup and actually it's a really simple thing to do.
Here are the steps for firwware version 1.3.3:
1. Login to switch's ILOM interface. There should be an https address for that
2. Click on the "Maintenance" tab an then "Backup/Restore"
3. Select "Backup" as operation and "Browser" as transfer method from the drop downs
4. Write a passphrase
5. Click "Run" button and save the XML output.
6. For the next item to backup logon to switch through ssh
7. Take a backup of the file opensm.conf under /etc/opensm/ directory to somewhere else.
8. Last to backup is the output of the commad: version
Don't forget to repeat steps for other infiband switches too:)


 Posts
Posts

